Herby chickpea croquettes
Ingredients
Method
- Rinse the chickpeas, drain them and dry them well in a tea towel. Wash and carefully dry the herbs. Peel the onion and garlic.
- Pulse the onion, garlic and herbs in a food processor, then add the chickpeas, spices, lemon zest and juice, salt and pepper. Blitz until you have a mixture that is still slightly grainy.
- Add the gram flour and mix. If possible, leave the mixture to rest for 15 minutes in the fridge.
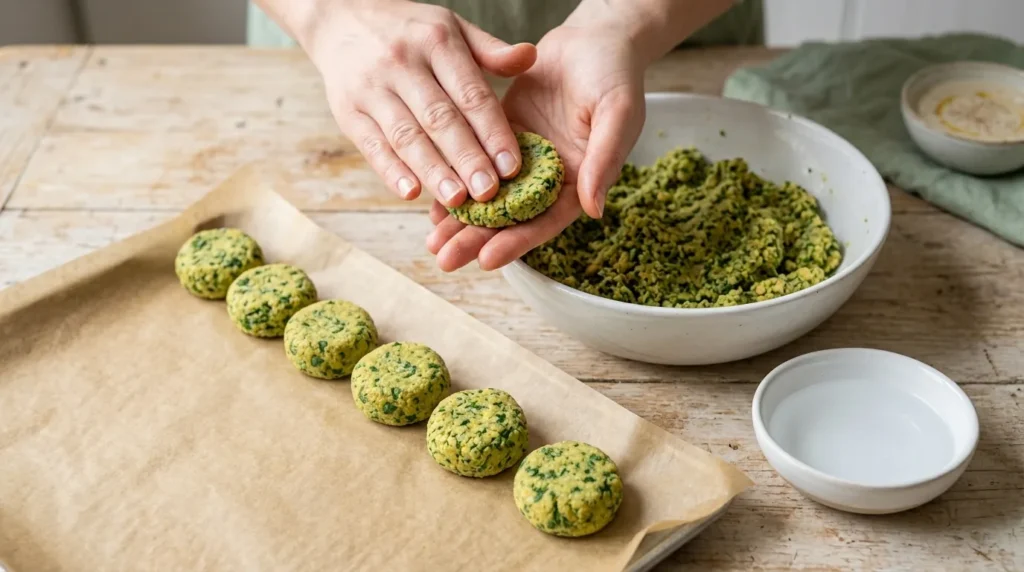
- With slightly damp hands, shape 16 small patties about 4 cm across.
- Heat the oil in a large frying pan over a medium heat. Fry the croquettes for 3 to 4 minutes on each side until golden, in two batches if necessary, then drain them on kitchen paper.
- Mix the tahini, yoghurt, lemon juice, turmeric and salt until you have a smooth sauce. Serve the croquettes hot with the sauce.
Notes
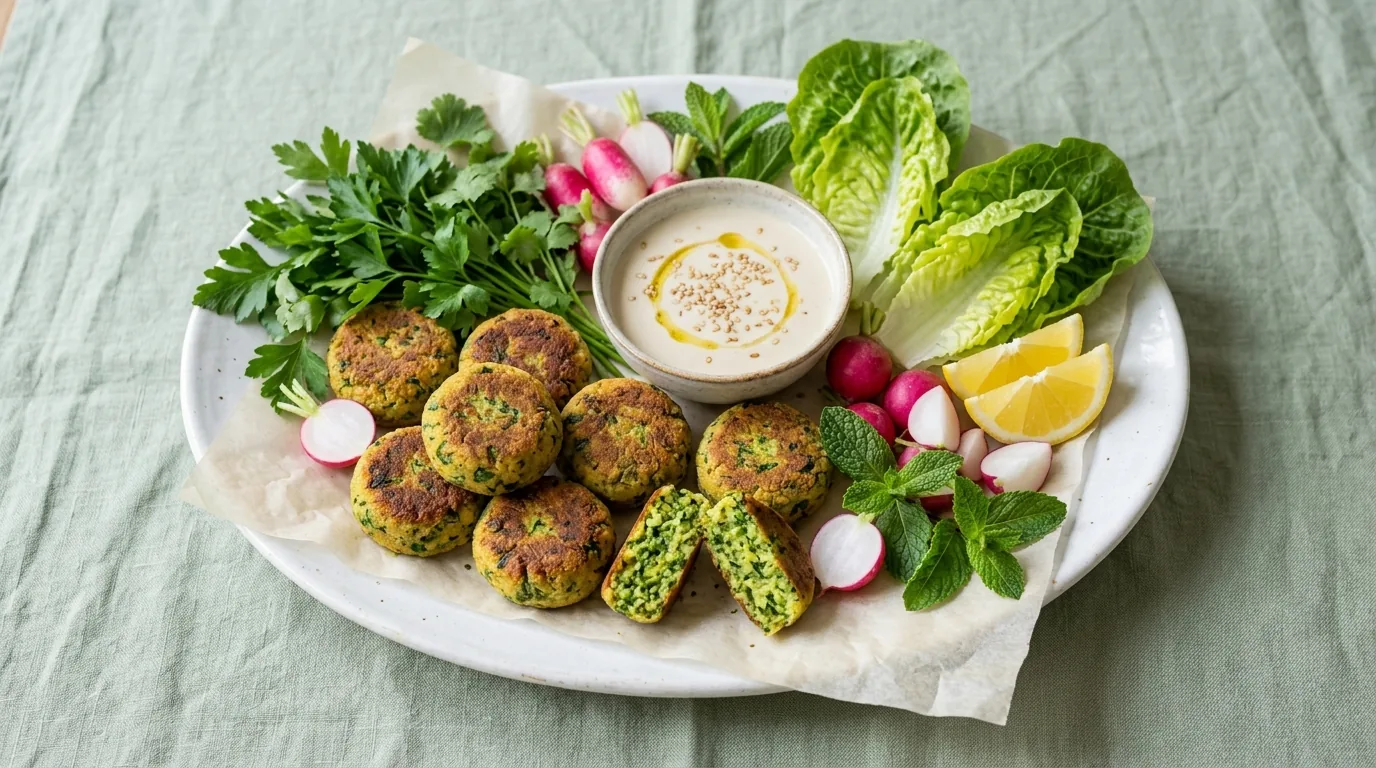
Golden on the outside, tender and green on the inside, herby chickpea croquettes are the easy cousins of falafel. There is no need to soak the chickpeas overnight here: you start with cooked chickpeas, blitzed with a big handful of parsley, coriander and mint, a little cumin and some lemon. Shaped into small patties and browned in a frying pan, they are served with a tahini sauce, in a pitta, on a salad or as nibbles with drinks.
Chickpea croquettes or falafel: what’s the difference?
Falafel is one of the most famous street foods of the Middle East. Its exact origin is debated, but it is often associated with Egypt, where ta’amiya is still made with dried broad beans. In Lebanon, Syria, Palestine, Israel and Jordan, it is most often made with chickpeas.
Real falafel has a feature many people don’t know about: it is made with dried chickpeas that are simply soaked and never cooked. Blitzed raw with the herbs and spices, they keep enough starch to hold together on their own when fried, with no egg or flour. With cooked chickpeas, the mixture would be too soft and the balls would fall apart in the oil.
Our croquettes are therefore an everyday version: they use cooked chickpeas, from a tin or a jar, bound with a little gram (chickpea) flour, and are cooked in a frying pan with very little oil or in the oven. They are softer than falafel and less crispy, but they are ready in 35 minutes with no need to plan the day before. And if you want to try real falafel, we give you the method in the variations.
The power of fresh herbs
What makes the difference in these croquettes is the herbs. Don’t be afraid of the quantities: a whole bunch of parsley and half a bunch of coriander for 480 g of chickpeas. They give the inside that lovely green colour and a fresh, almost lemony flavour.
- Flat-leaf parsley is the base. More fragrant than curly parsley, it brings freshness and vitamin C. The thinnest stalks can go into the food processor with the leaves.
- Coriander gives the typical Middle Eastern note. If you don’t like it, simply replace it with more parsley.
- Mint, in small amounts, livens everything up. A few leaves are enough.
- Chives or dill can also find their place, depending on what you have in the garden or the fridge.
Wash the herbs and dry them well, in a salad spinner and then in a tea towel: wet herbs would make the mixture sticky.
Our third chickpea recipe
The chickpea is one of our favourite ingredients, because it is cheap, keeps for ages and lends itself to countless dishes. In summer, we love it crunchy in our chickpea, feta and cucumber salad. On busy evenings, it browns in the pan in our chickpea, spinach and turmeric pan-fry. And when we feel like sharing, it becomes croquettes.
Rich in plant protein and fibre, it makes these croquettes nourishing: with a salad and a little bread or bulgur wheat, they make a real, complete vegetarian meal. Don’t forget to keep the liquid from the tin: this is aquafaba, the base of our aquafaba chocolate mousse.
The secret of chickpea croquettes that hold together
Very dry chickpeas
Rinse the chickpeas, drain them well, then pat them dry in a clean tea towel. The less moisture they have, the firmer the mixture will be and the easier it will be to shape.
Blitz, but not too much
Pulse the food processor, scraping down the sides of the bowl. The mixture should stay slightly grainy, like coarse sand, rather than turning into a smooth purée like hummus. These little pieces are what give the croquettes their texture.
Gram flour
It acts as a binder, with no egg, and boosts the chickpea flavour. It is also naturally gluten-free. If the mixture still sticks to your fingers, add another tablespoon. Failing that, wheat flour or breadcrumbs also do the job.
A spell in the fridge
If you have time, leave the mixture to rest for 15 minutes in the fridge before shaping the croquettes. It firms up and the croquettes hold together even better during cooking. Shape them with slightly damp hands: the mixture won’t stick.
Don’t turn them too soon
Place them in the hot oil and let them cook for 3 to 4 minutes without touching them. Once a golden crust has formed, they turn easily with a thin spatula.
The tahini sauce
You can’t serve chickpea croquettes without a tahini sauce. Tahini is a paste of ground sesame seeds, used throughout the Middle East, notably in hummus. Mixed with yoghurt, lemon and a little water, it makes a creamy sauce tasting of toasted sesame that perfectly balances the herbs and spices. For a vegan version, replace the yoghurt with cold water, added a little at a time: the tahini will thicken at first, then become smooth and pourable.
A pinch of turmeric in the sauce gives it a pretty golden cream colour. To find out more about this spice, read our article on the health benefits of turmeric.
How to serve chickpea croquettes
- In a pitta, with lettuce, tomatoes, cucumber, red onion and the tahini sauce, like a falafel wrap.
- In a bowl, on bulgur wheat or quinoa, with raw vegetables and seeds.
- As nibbles, as small balls on cocktail sticks, with the sauce as a dip.
- With a green salad and a few radishes, for a light dinner.
- In a packed lunch: they can also be eaten cold.
For a really colourful meal, serve them with our pumpkin seed pesto instead of the tahini sauce.
Variations
Real falafel
Soak 250 g of dried chickpeas for 12 to 24 hours in plenty of cold water. Drain them, dry them and blitz them raw with the herbs, onion, garlic and spices, without flour. Add half a teaspoon of bicarbonate of soda just before cooking for a lighter centre. Shape into balls and deep-fry them for 3 to 4 minutes in oil at 175°C. Important: never use tinned chickpeas for this version. And for oven-baked falafel with very little oil, follow our detailed recipe for baked chickpea falafel.
In the oven
Place the croquettes on a baking tray lined with baking paper, brush them with olive oil and bake them for 20 to 25 minutes at 200°C (180°C fan), turning them halfway through. They are lighter and a little less golden.
With grated vegetables
Add a grated carrot or small courgette, squeezed well. The croquettes will be softer and even more colourful. If you like vegetable patties, try our oat and vegetable patties and our kidney bean and oat veggie burger too.
Storage
Cooked croquettes keep for 3 days in the fridge. Reheat them for a few minutes in the oven or a frying pan to bring back their crispness. You can also freeze the raw croquettes, flat on a tray, then transfer them to a freezer bag: cook them straight from frozen, without defrosting, allowing a little extra cooking time. The tahini sauce keeps for 4 days in the fridge.
Frequently asked questions
My croquettes are crumbling: what can I do?
The mixture is probably too wet or not bound enough. Add one or two tablespoons of gram flour and leave it to rest in the fridge before shaping the croquettes.
Can I make them without a food processor?
Yes. Mash the chickpeas with a fork or a potato masher, and chop the herbs very finely with a knife. The texture will be more rustic, but just as good.
Are these croquettes vegan and gluten-free?
Yes: with gram flour and the tahini sauce made with water, they contain no animal products and no gluten.