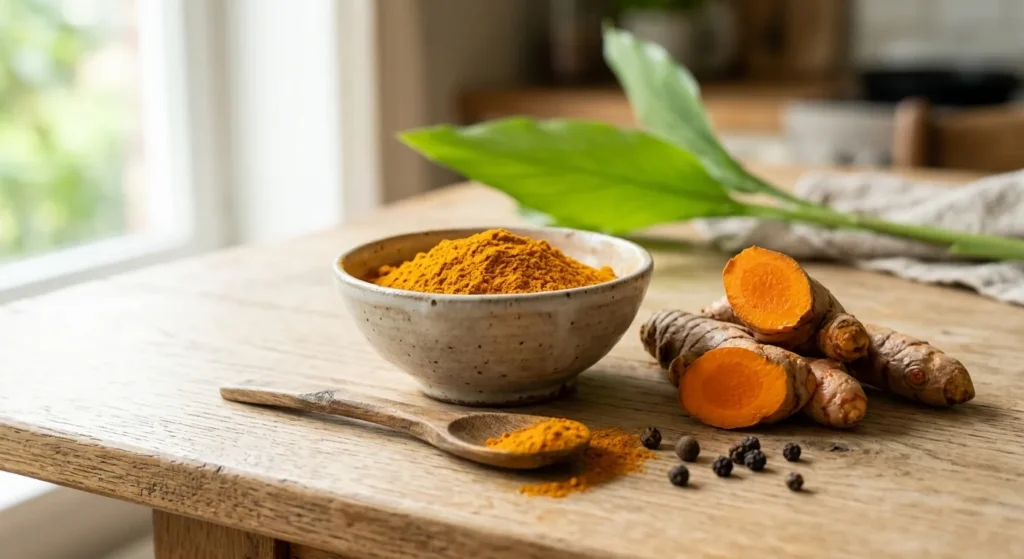
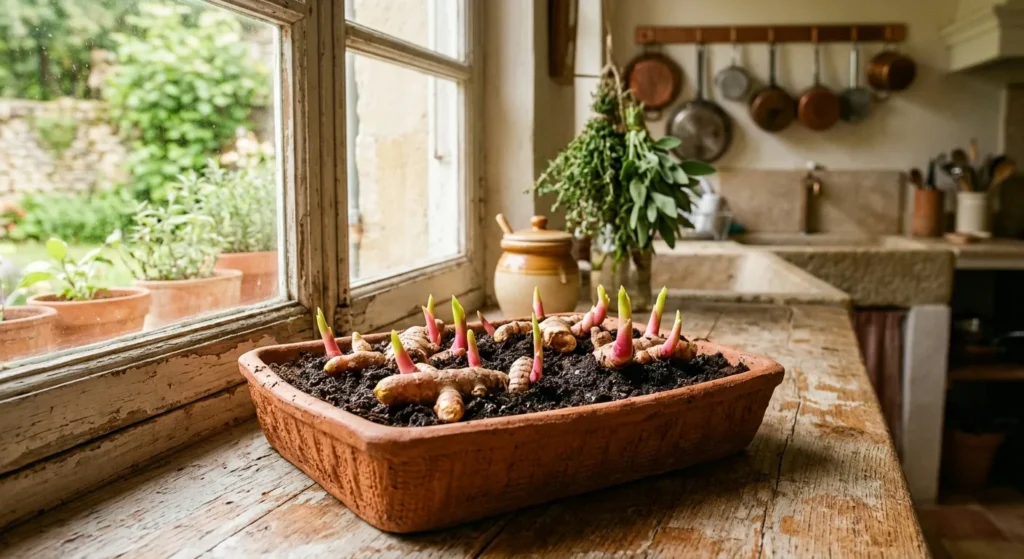
Have you ever bought a piece of turmeric root at the market and wondered whether it could sprout? Good news: it can. Growing turmeric is entirely possible in a temperate climate, as long as you treat it for what it is, a tropical plant that loves warmth. In this guide, you’ll see how to grow turmeric from a simple rhizome, when to plant it, how to look after it in a pot and when to harvest your own golden roots.
Turmeric, a tropical plant that is easy to tame
Turmeric (Curcuma longa) belongs to the same family as ginger, the Zingiberaceae. Native to South Asia, it has been grown for thousands of years in India, which today produces most of the world’s turmeric, as our article on the history of turmeric explains. France even grows it on Réunion Island, in the Indian Ocean, where it is called “safran péi” and is the pride of the village of Plaine-des-Grègues.
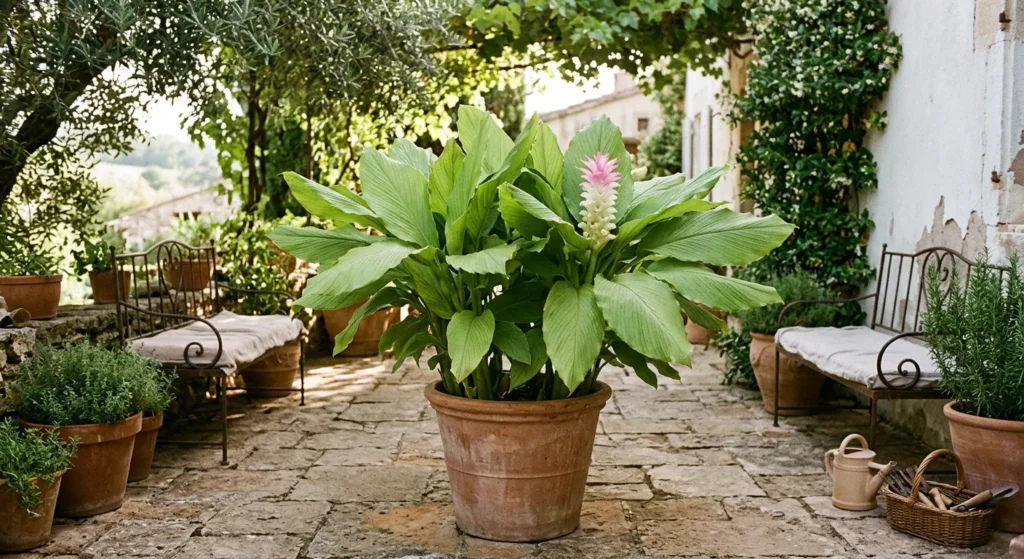
The part we eat is not a root in the strict sense but a rhizome: a fleshy underground stem, bright orange inside, that branches out into “fingers”. Above ground, the turmeric plant forms large, soft green leaves that can reach 1 metre in height. It is a perennial: every winter its foliage dies back and the rhizome goes dormant, before starting again the following spring.
An important detail for gardeners: cultivated turmeric produces almost no fertile seeds. So you don’t sow it; you propagate it by replanting pieces of rhizome. That is exactly what makes it so easy to get started.
When to plant turmeric: the growing calendar
Turmeric needs a long warm season, around 8 to 10 months between planting and harvest. In a temperate climate, the trick is therefore to start it indoors at the end of winter to gain time. Here is the calendar to follow.
| Period | Step |
|---|---|
| February – March | Sprout the rhizomes somewhere warm, indoors |
| March – April | Plant in a pot as soon as the first shoots appear |
| Mid-May (after the frosts) | Move the pot out onto the balcony or patio |
| June – September | Growth: regular watering and feeding |
| Late September – October | Bring the pot in as soon as nights drop below 12 °C |
| November – December | The leaves turn yellow: time to harvest |
In short, if you are wondering when to plant turmeric: start sprouting between February and March, and plant by April at the latest. Later planting is still possible, but the harvest will be smaller.
How to sprout a turmeric rhizome bought at the market
Choosing the right rhizome
To plant a turmeric rhizome, there’s no need to visit a garden centre: a fresh rhizome from an organic shop or an Asian grocer works perfectly. Choose one that is very firm, heavy, with no mould or soft spots, and preferably organic: some non-organic rhizomes may be treated to stop them sprouting. Look for the small buds, called “eyes”, which look like tiny pale bumps: these will become the future stems.
Cut the rhizome into pieces about 5 cm long, each with at least two or three eyes. Leave the cut ends to dry in the open air for a day: this reduces the risk of rot.
How to sprout turmeric
Sprouting turmeric is the step that requires the most patience. Here is the most reliable method:
- Soak the pieces overnight in lukewarm water to wake them up.
- Lay them flat in a tray filled with moist potting mix, eyes facing up, barely covered.
- Cover with cling film or a clear lid to keep in the moisture.
- Put everything somewhere warm, ideally between 22 and 28 °C: above a radiator or an internet router, for example.
- Keep the potting mix just moist, never soggy.
The first shoots usually appear after 3 to 8 weeks. Don’t be discouraged if nothing happens for a month: that’s normal, turmeric is slow to get going.
How to plant turmeric, step by step
Which pot and potting mix for turmeric?
Turmeric in a pot is the ideal solution in a cool climate, because you can bring the plant indoors as soon as the cold arrives. Choose a container that is wide rather than deep: the rhizome spreads horizontally. A pot 30 to 40 cm across and at least 25 cm deep is suitable for two or three pieces. It must have drainage holes.
When it comes to potting mix for turmeric, the aim is a rich but very free-draining soil, because excess water is enemy number one. A good mix:
- 2 parts good-quality potting compost (multi-purpose or houseplant compost),
- 1 part well-rotted garden compost,
- 1 part sand or perlite for drainage,
- a layer of clay pebbles or gravel at the bottom of the pot.
Planting
Plant the sprouted rhizomes 3 to 5 cm deep, shoots facing up, about 15 cm apart. Cover, firm gently and water once to moisten the soil thoroughly. Then keep the pot somewhere warm, near a bright window, until outdoor temperatures stay above 15 °C.
Growing turmeric at home: care, light and watering
Position: light, temperature and humidity
The right position for turmeric is like a tropical forest floor: plenty of light, but no scorching sun. On a balcony or patio, choose bright partial shade, with morning sun and shade during the hottest hours. Indoors, place it near a large window, without touching the glass in high summer.
Temperature matters even more than light. Turmeric grows well between 20 and 30 °C, slows down below 15 °C and suffers below 10 °C. It cannot tolerate frost. It also likes humid air: indoors, mist its leaves from time to time or stand the pot on a saucer filled with damp clay pebbles.
Watering and feeding
During the growing season, from June to September, water as soon as the surface of the soil is dry, without ever leaving water standing in the saucer. Every two to three weeks, add an organic fertiliser rich in potash (such as tomato feed) or a handful of compost: the rhizome is a hungry feeder as it grows. In autumn, gradually water less often.
The turmeric flower: care and flowering
With a little luck, your turmeric will give you a lovely surprise at the end of summer: a spike-shaped turmeric flower, made of white to soft pink bracts, rising from the heart of the foliage. Flowering isn’t guaranteed in a pot, but it is more common on well-established, well-fed plants. When it comes to caring for the turmeric flower, nothing special is needed: keep the same warmth, bright light without direct sun and regular watering. The flower lasts several weeks and doesn’t stop the rhizomes from forming.
Common problems
- Rotting rhizome: too much water or soil that is too heavy. Lighten the mix and water less.
- Leaves with dry tips: air too dry or sun scorch. Increase humidity and move the plant into partial shade.
- Fine webs and dull leaves: a sign of red spider mite, common in dry indoor air. Shower the foliage and mist regularly.
- Nothing grows: it is probably too cold. Turmeric only really gets going above 20 °C.
When and how to harvest your own turmeric roots
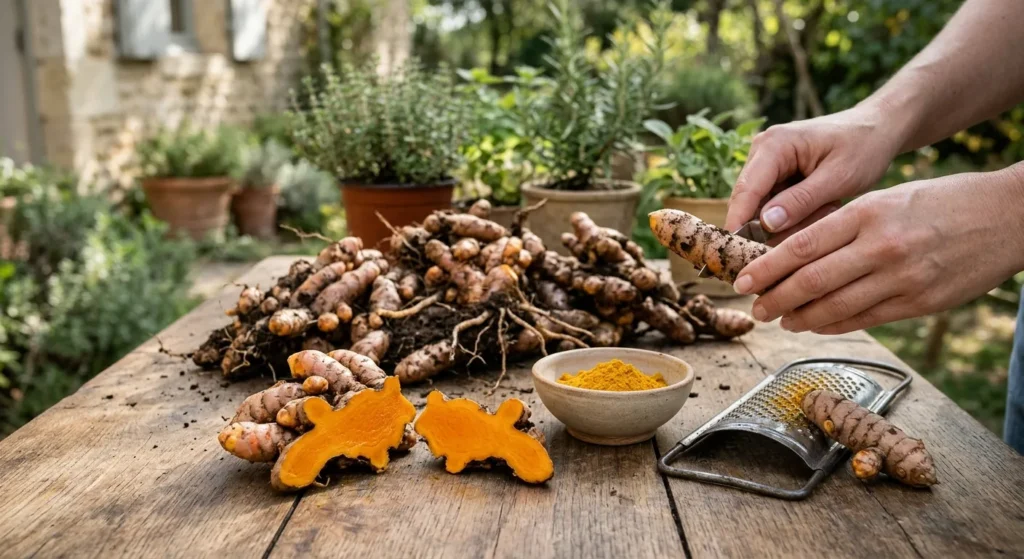
Harvesting turmeric takes place 8 to 10 months after planting, usually between November and December for a spring planting. The signal is unmistakable: the leaves turn yellow and then dry out. Stop watering for two to three weeks, then tip the root ball out of the pot.
You’ll find a network of orange rhizomes, often much bigger than the piece you planted. Shake off the soil, rinse gently with water and cut off the dry stems. Remember to keep a few good pieces with eyes for next season: that way your turmeric becomes an endless crop.
You can also harvest just part of the rhizomes by digging at the side of the pot, and leave the rest to overwinter. In that case, keep the pot dry, frost-free, between 12 and 18 °C, until it wakes up in spring.
Storing turmeric rhizomes after harvest
Once harvested, your rhizomes can be stored in several ways:
- In the fridge: 2 to 3 weeks in the vegetable drawer, wrapped in kitchen paper and then in a container.
- In the freezer: several months, whole and unpeeled. They are very easy to grate while still frozen.
- For replanting: away from light, in a cardboard box or dry sand, between 12 and 18 °C.
- As homemade powder: boil or steam the rhizomes for 20 to 30 minutes, peel them, cut them into thin slices, then dry them in a dehydrator or in the oven at a low temperature (door ajar) until they snap cleanly. All that’s left is to grind them finely and store the powder in an airtight jar, away from light.
Wear gloves when handling fresh turmeric: it strongly stains fingers, chopping boards and worktops.
Enjoying the benefits of fresh turmeric in your cooking
The first pleasure of a homegrown harvest is cooking with ultra-fresh turmeric, which has a livelier, slightly peppery aroma compared with the powder. Finely grated, it slips into a traditional golden milk, a soup, a curry or a salad dressing. It also works wonders in roasted turmeric cauliflower. As a guide, allow about 1 cm of grated fresh rhizome for half a teaspoon of powder.
And what about the benefits of fresh turmeric? It contains the same compounds as the powder, including curcumin, in a slightly lower proportion since it contains water. To separate fact from fiction about its effects, read our article on the benefits of turmeric, and to compare the different forms, our guide to fresh turmeric, powder or capsules.
Even the leaves are useful: highly fragrant, they are used in India, especially in Kerala and Goa, to wrap fish or small steamed rice cakes, to which they give a delicate aroma.
Can you grow turmeric outdoors in the ground?
In a temperate climate, growing turmeric in open ground is tricky. Turmeric cannot tolerate frost and needs several months above 20 °C. In the mildest regions, such as Mediterranean coasts, you can try it in a sheltered, sunny spot, planting after the last frosts and lifting the rhizomes before the first cold snaps. Everywhere else, and this is the safest choice, a pot remains the best option, or even a heated greenhouse or conservatory for the best results.
Turmeric also has a lot in common with its cousin ginger, which is grown in the same way: our complete guide to ginger also explains how to grow it in a pot.
In a nutshell
- A firm, organic rhizome bought at the market is all you need to get started.
- Sprout it somewhere warm from February–March: allow 3 to 8 weeks.
- Plant it in a wide pot, in rich, free-draining potting mix, 3–5 cm deep.
- Give it warmth, bright partial shade and regular watering without overdoing it.
- Harvest 8 to 10 months later, when the leaves turn yellow, and keep a few pieces to replant.
With a little patience, growing turmeric becomes a small yearly ritual, and the pleasure of grating your own golden root is priceless. Happy growing!